

I’m still updating this post, so expect changes.
Retro Computer Build
Today you're going to join me on a project I've been wanting to do for a long time: building a PC with Windows XP. The idea is to put together a machine from the XP era using mostly original parts from that time. Since Windows XP had a pretty long lifespan, it's not easy to choose a specific period to base the build on, but the deciding factor ended up being when I found a cheap Pentium 4 still in the box. The goal here isn’t to build “the ultimate machine,” super powerful or packed with high-end components. The idea is to create a simple, fun PC that stays true to the spirit of the time and, of course, as cheap as possible. Just a quick note: if the goal were just to save money, an old Dell Optiplex would get the job done and cost way less. But honestly, that would take the fun out of the project for me. Part of the enjoyment is precisely in picking out each part, building everything from scratch, and reliving the experience the way it used to be.
Computer Specs
Before building the computer, let's take a look at the parts I managed to get:
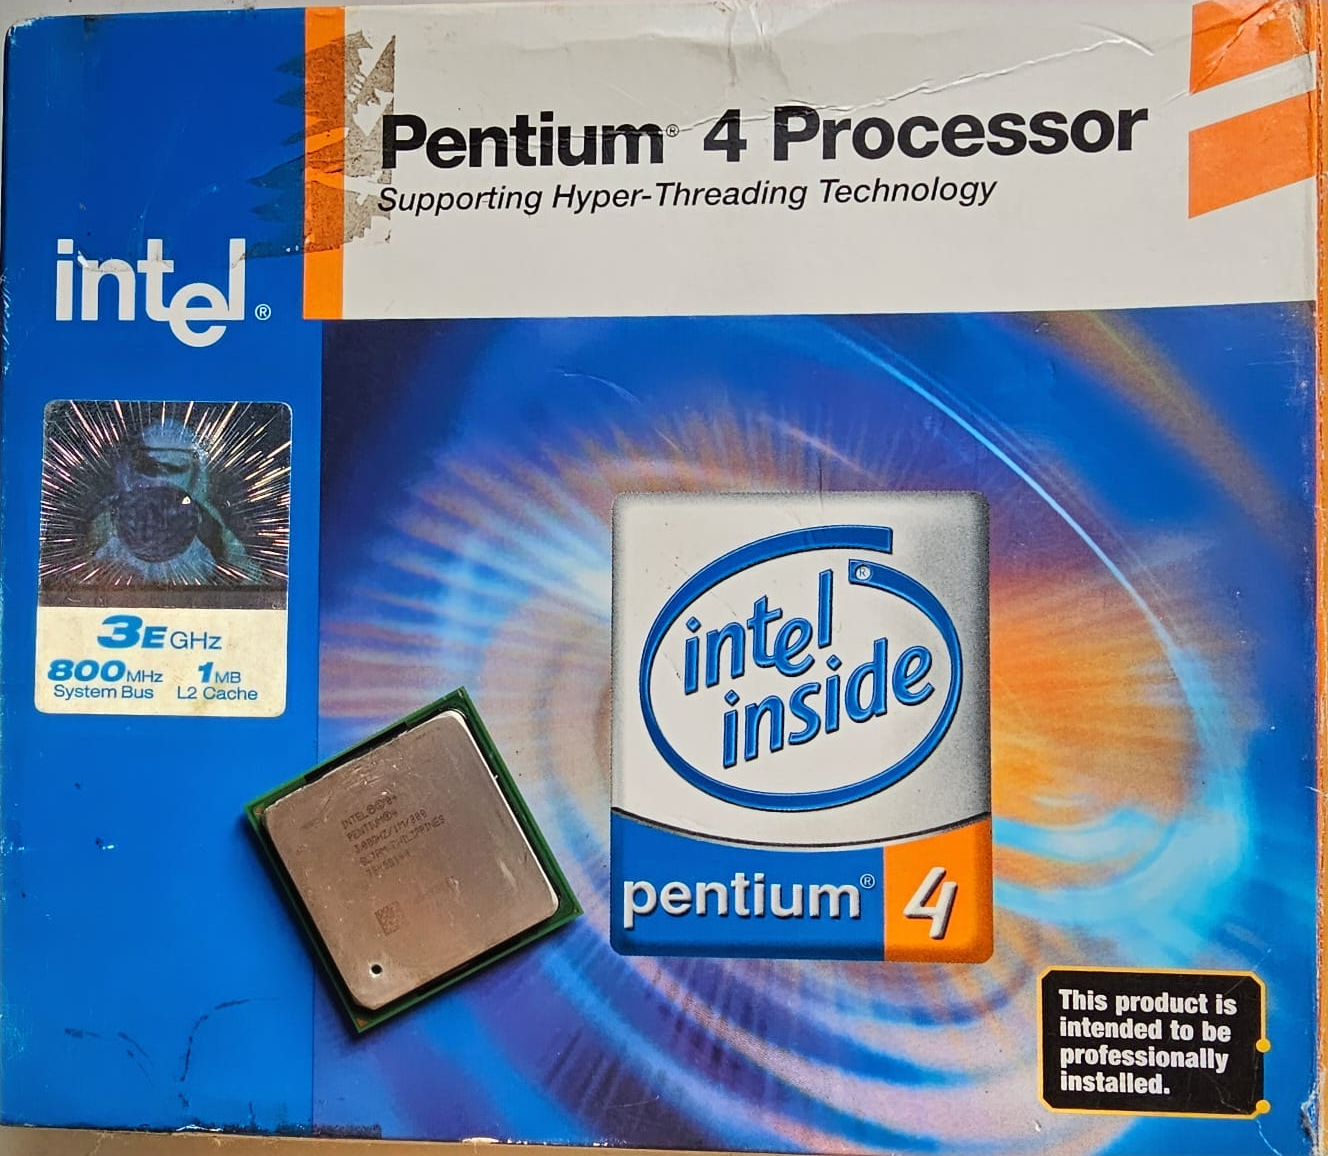
First, as mentioned earlier, we have the processor: an Intel Pentium 4 3.0E GHz, from the Prescott generation, with socket 478. Released in 2004, it features 1 MB of L2 cache, an 800 MHz FSB, and Hyper-Threading support, which allows the system to recognize two logical cores. Although it's known for running hot (earning the nickname "PresHot") it's a processor I have a certain fondness for, despite all its flaws.
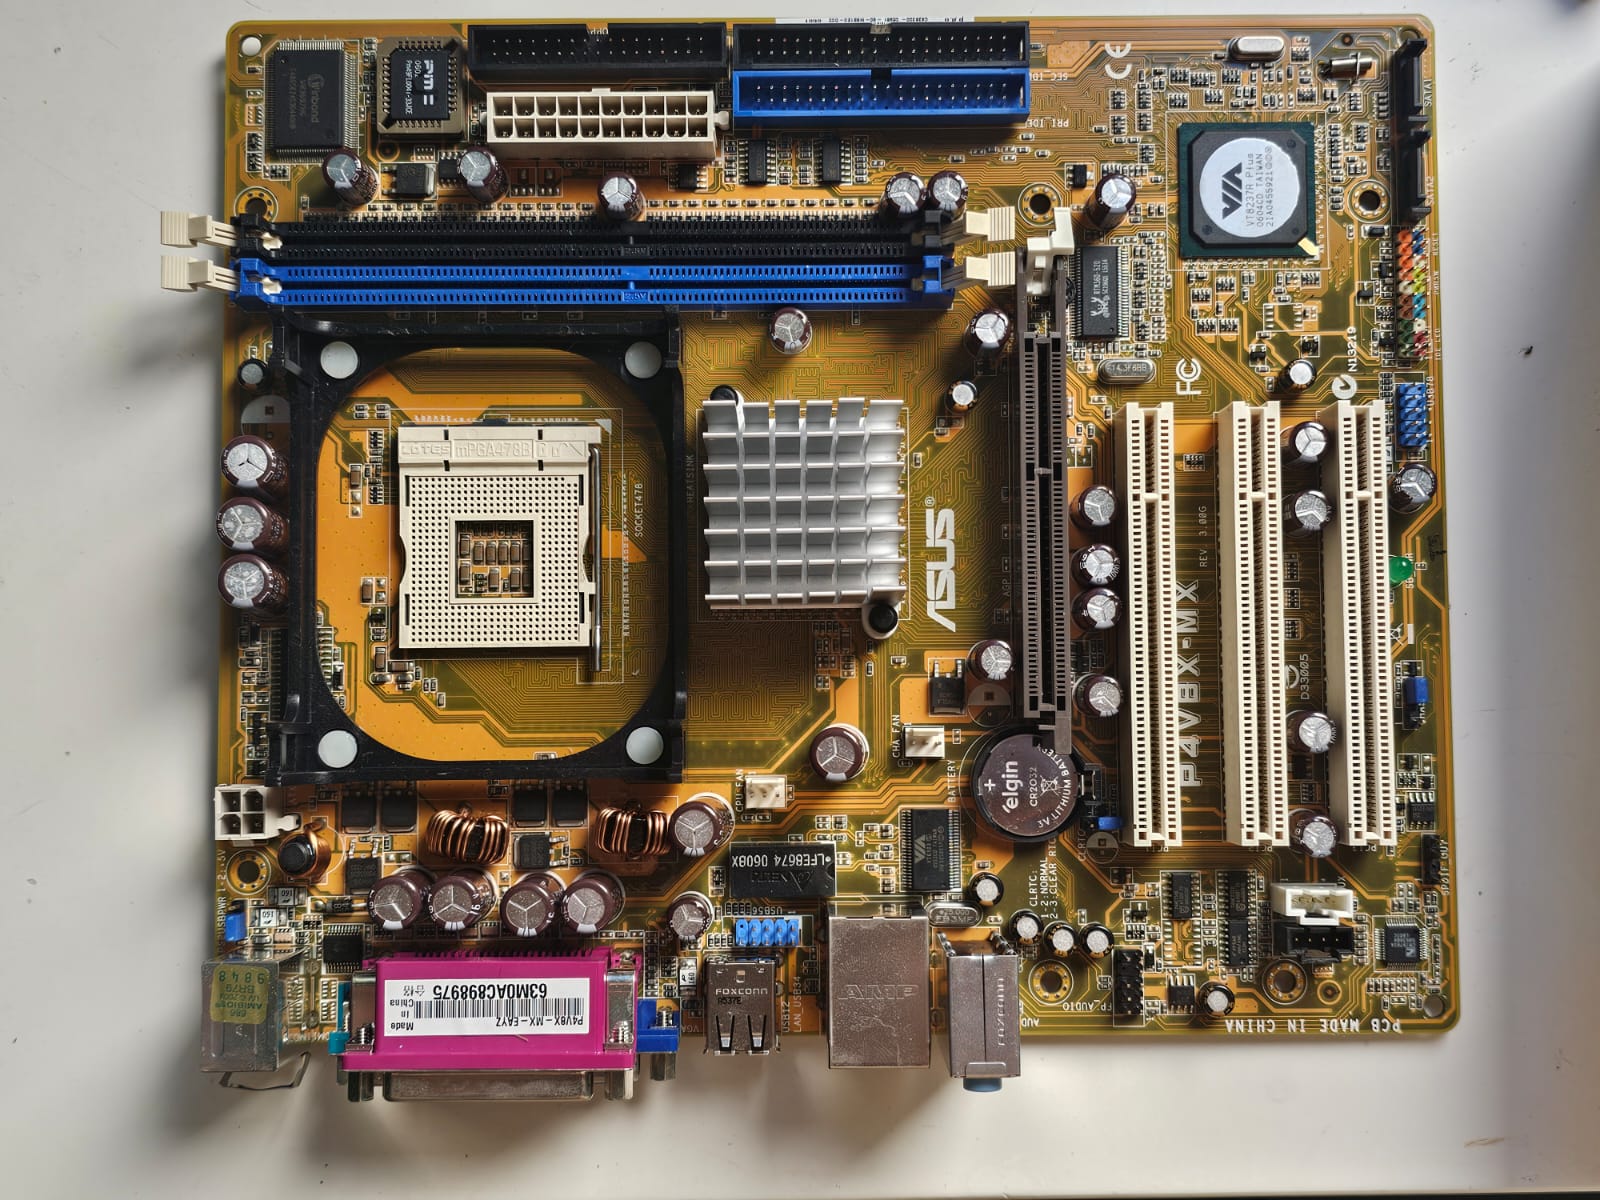
Now, when it came to choosing the motherboard, I had two basic criteria: it needed to support the selected processor and come from a reliable, well-known brand. I ended up finding the ASUS P4V8X-MX, released in 2004, featuring socket 478 and support for DDR memory only. While it wasn’t a high-end board, it was stable and representative of the popular motherboards from 2004 to 2006. What really surprised me was its SATA support, which saved me the trouble of using a SATA-to-IDE adapter. I was a bit worried it might have capacitor issues. For those who don’t know, here’s a quick summary: the “capacitor plague” was a widespread problem that affected capacitors manufactured between 1999 and 2007, leading to a much higher failure rate than expected. These failures impacted several well-known brands and were especially common in motherboards, graphics cards, and power supplies. Fortunately, upon inspecting the board, there didn’t seem to be any bulging capacitors — everything looked to be in good condition. Foreshadowing.
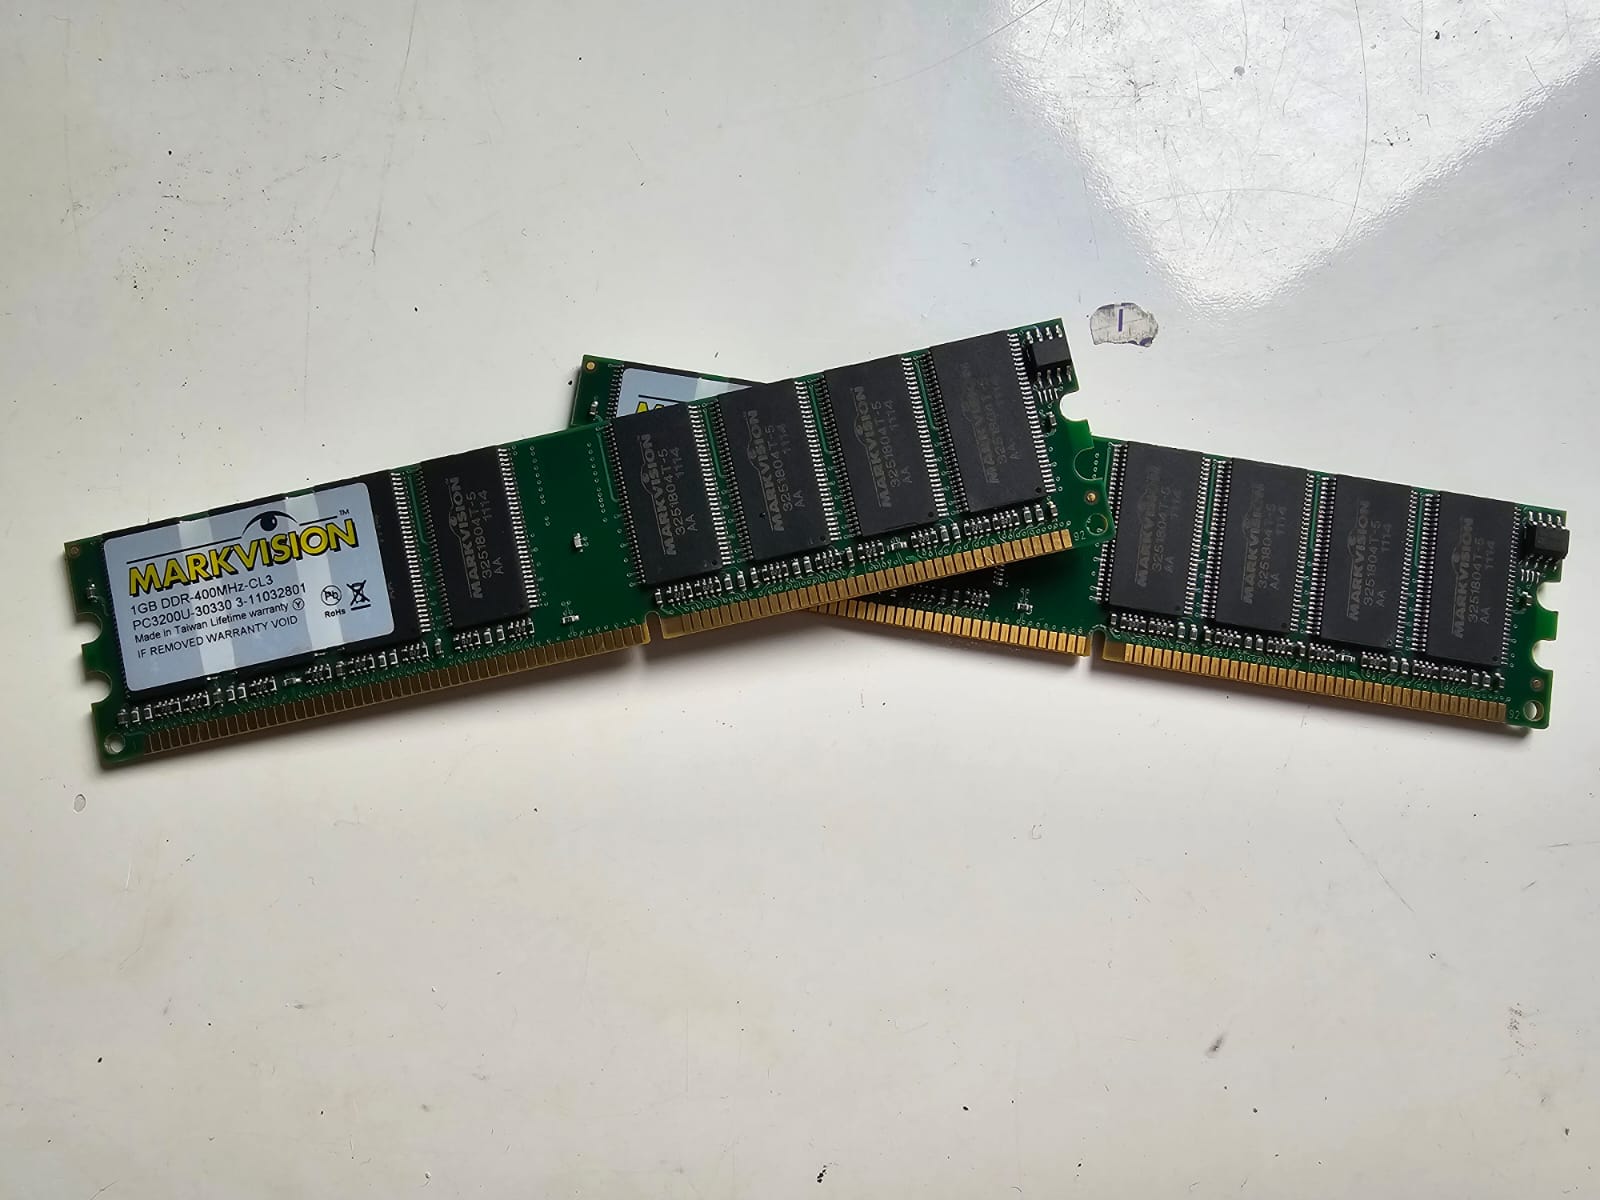
For the RAM, I opted for the maximum amount supported by the motherboard: 2 GB. I got two 1 GB sticks running at 400 MHz, which is probably overkill, but since they were cheap, I decided to go for it. They’re from a brand I had never heard of before, but the modules were completely new.
For the power supply, since PCs from that era didn’t require much power, I looked for something between 300 W and 400 W, with an 80 Plus Bronze certification and that wasn’t expensive. I ended up finding a used 350 W Seasonic unit with 80 Plus Bronze. It was a slim model, but that didn’t cause any issues. Later on, I ended up swapping it for a newer model for reasons that will become clear further ahead. The replacement was a brand-new gaming power supply from Mancer, with 400 W and also 80 Plus Bronze certified.
For storage, since this motherboard supports SATA, I chose a 120 GB SanDisk SSD that I had lying around, which is definitely more than enough for my needs. I'm not sure if it will make the system significantly faster, since the SATA ports from that era seem quite primitive, but I believe it should still provide a noticeable speed boost compared to a traditional IDE hard drive.
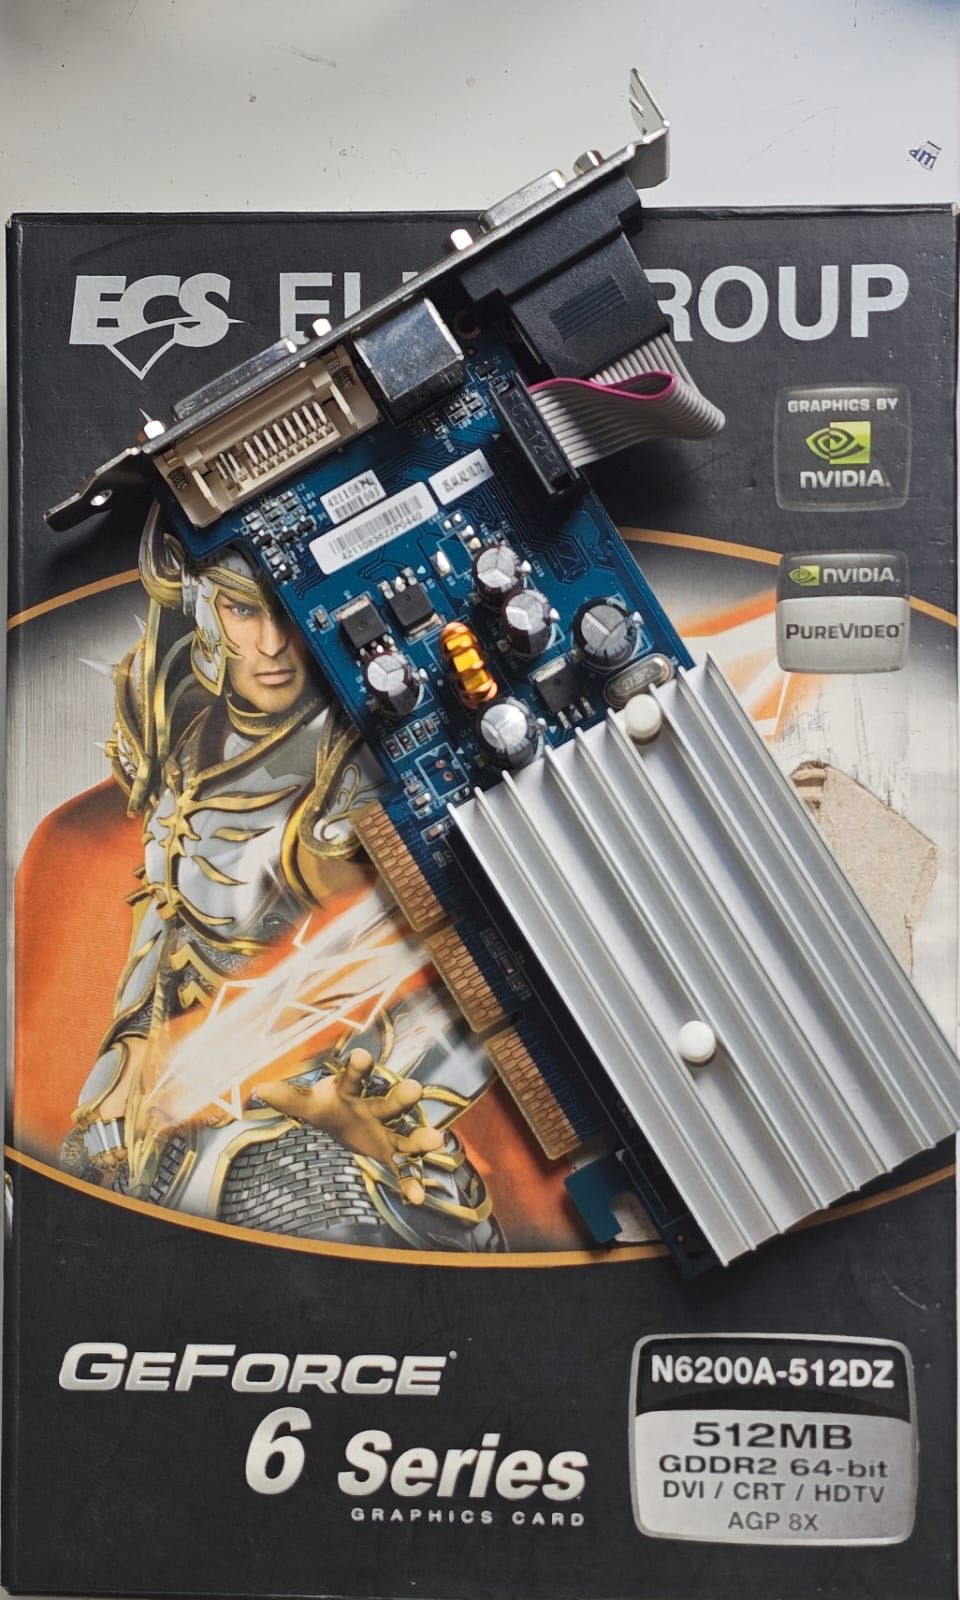
Now let's move on to the special part: the video card. This motherboard only supports the AGP standard, the predecessor of PCI Express. AGP cards are known to be more fragile and, on top of that, they’re quite rare where I live. Actually, all types of video cards are somewhat hard to find around here, but that’s another story. My idea was to find a high-end video card, but due to scarcity, I knew that would be tricky. After a lot of searching, I ended up finding a 512 MB GeForce 6200 from ECS Elitegroup. It’s a mid-tier card that will probably get the job done for what I want to do. If I find a better, working option at a reasonable price in the future, I might upgrade, but that’s something for later.
For the case, I went with the cheapest option possible, and that’s all I have to say about that. The only “problem” is that it doesn’t have space for a DVD drive, but that can be solved with those DVD-to-USB adapters. Anyway, that doesn’t matter much since I’ll be installing Windows XP via USB stick anyway.
Now that I have all the parts, it’s time to build the PC. I already have a fair bit of experience assembling computers, and I think this should be pretty straightforward, right? Right?! next.