My God... this computer gave me more trouble than any machine should ever cause a human being. This machine was not built by me. No. I may have assembled the parts, but what was born in the end was not a computer. It was a torture device straight from the depths of hell, fueled by my tears. Ancient forces inhabited its circuits.
Let’s take it step by step. First of all, I tested the components to see if they worked, and well, they all worked perfectly. They powered on and went straight to the BIOS. Okay, wonderful!
The problem appeared when I tried to remove the Intel stock cooler, I broke one of the plastic clips that held the cooler to the motherboard. My fault, but I left it like that for a while anyway.
When assembling everything in the case, it was also smooth. The issue came when I tried to install the operating system. My plan was to install MX Linux to run some tests, since Linux is the OS I have the most experience with. So I grabbed a 32-bit MX Linux ISO with Fluxbox, but when I tried to install it, the system froze halfway through and stayed frozen until I pressed the reset button by force.
This was hell. No matter what I did, the operating system would freeze during installation or randomly reboot. So I started diagnosing the issue.
My first suspicion was the CPU overheating, precisely because of the broken cooler. I tried to fix the clip, but it kept breaking again. So I bought a new cooler. I waited a week and… it came wrong. The mounting clips were missing. I had to return it, wait for the refund, and buy another one. After another week of waiting, the correct cooler finally arrived. But even after installing it properly, the problem remained.
I thought the cheap power supply was the problem, since these processors require a strong 12V rail. It's not that the power supply was bad, but I thought it wasn't providing enough. That's why I switched to the modern power supply I mentioned earlier, but it still didn't solve the issue. The system was still freezing.
Then I tested the memory using MX Linux’s memory test tool, and both sticks passed without issue. Next, I suspected the USB stick I was using, so I bought a new one at the mall. Still froze during installation.
Then I thought maybe, although the motherboard could boot from USB, it didn't handle it well. So I installed a DVD drive. Since I was out of DVDs, I had to make another trip to the mall to buy more. As I mentioned earlier, the case has no space for a DVD drive, so I had to leave it loose — but it worked. However, I still couldn’t install. This time, I got the furthest — it reached the installation stage, but then it crashed. The only OS I managed to install was Tiny Core, which let me do a few things, but there wasn’t much I could do with it.
At this point, I started to suspect that the SATA chipset on this motherboard was the problem. In the BIOS, the only options available were RAID and non-RAID — no AHCI. So I swapped the SSD for an old SATA HDD I had lying around, roughly from the same era, but it still froze during installation. I then considered switching to an IDE HDD or using one of those adapters I mentioned before. But I didn’t have an IDE HDD and, honestly, I really didn’t want to deal with IDE cables.
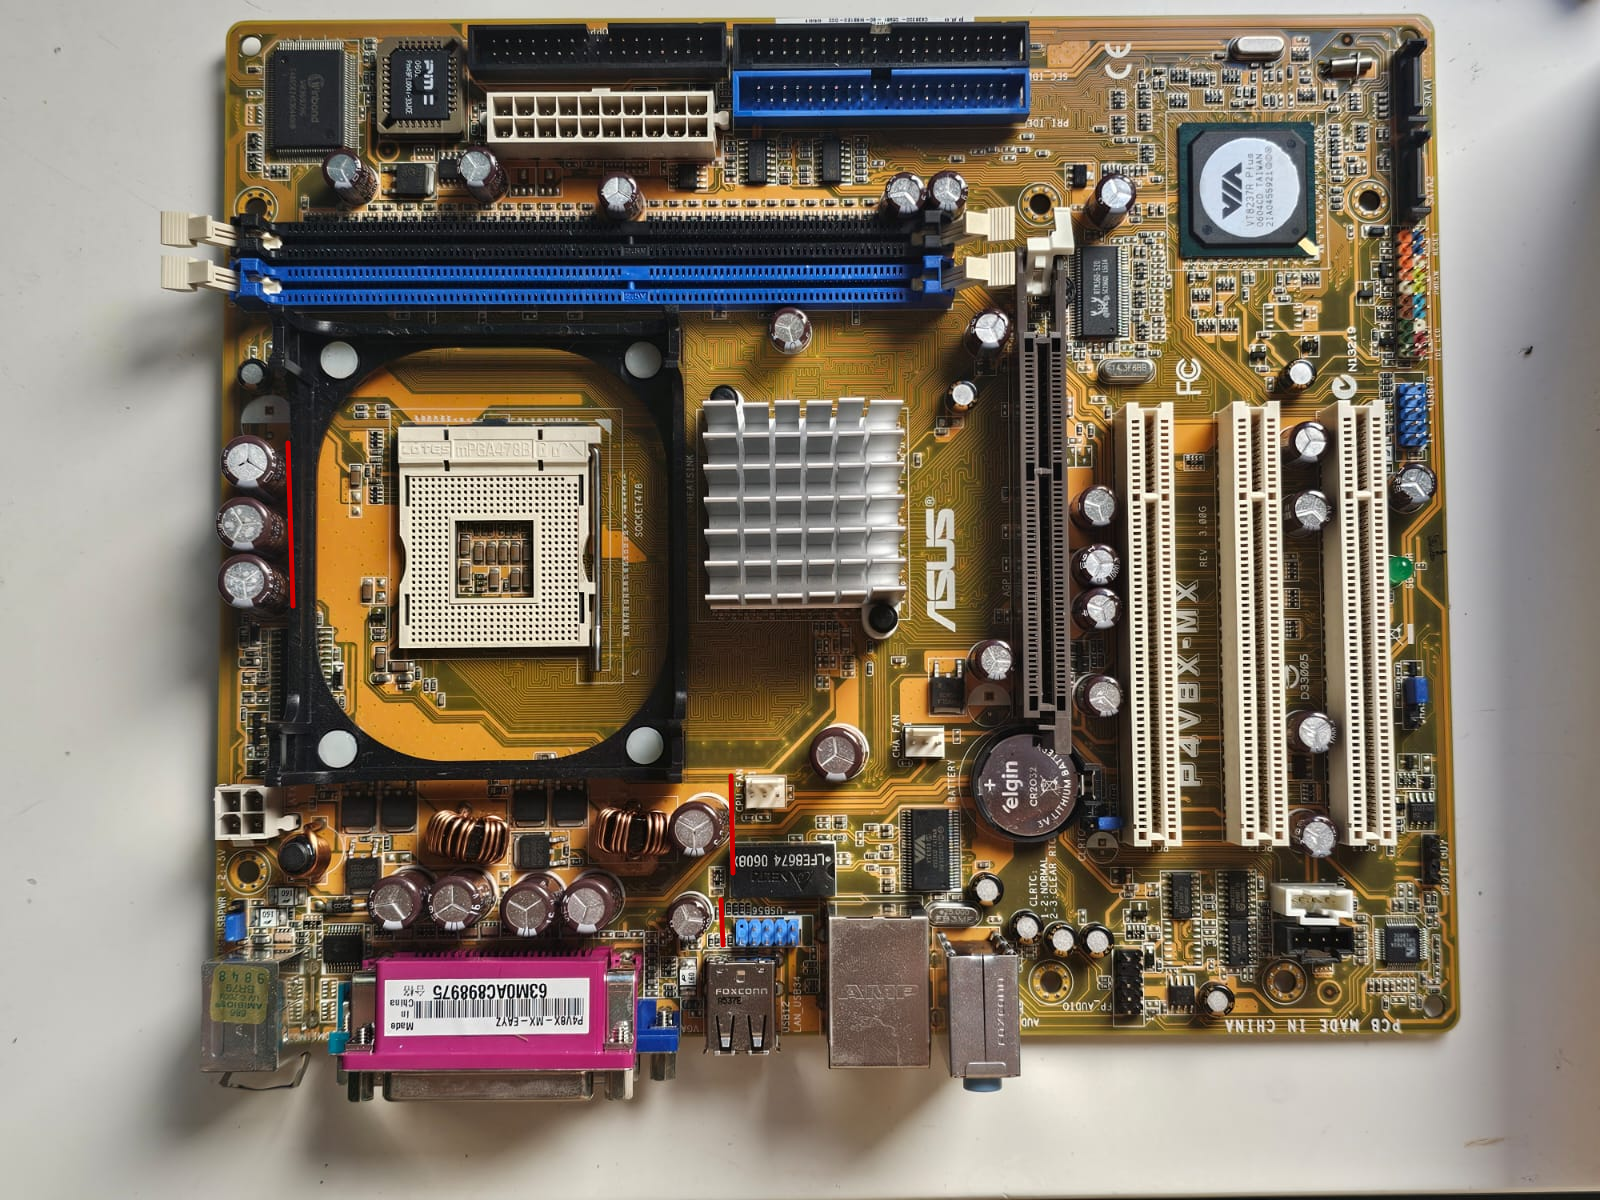
So, after a lot of research and talking to some people, I came to a conclusion: the problem was with the capacitors. Yep, bad news. It was somewhat expected, because if you looked closely, you could see that while some capacitors weren’t bulging, the tops were slightly leaking, which is already a bad sign.
The solution, of course, would be to replace the capacitors. The problem is, I have zero experience with soldering. I’ve tried before and ended up burning the circuits on the boards. So, I decided to set the project aside for a while.
However, after a while, I went back to working on the system and decided to replace the capacitors. The recommendation was to replace all of them, but I didn’t want to do that. So, I only replaced the ones that seemed to be in worse condition and the ones that the internet said commonly caused problems. I also took the opportunity to replace a capacitor on the video card that was definitely starting to bulge.
Obviously, I practiced a lot desoldering old boards that were beyond repair and soldered some capacitors. My Achilles’ heel has always been desoldering; I have trouble finding the right technique that works 100% of the time. Usually, the solder sucker works, but other times it’s the desoldering braid with flux, though I never found a definitive solution. When I managed to desolder, one hole would come out easily while another was a real nightmare. But after lots of practice and gaining confidence, I finally grabbed the components and got to work.
The first task was the video card. I managed to remove the bad capacitor, but when desoldering, I couldn’t remove the solder from one of the connection holes. Nothing worked, and I really couldn’t get the solder out no matter what. I started to get desperate and even thought about buying another video card, but I tried one more time. I thought: instead of trying to remove the solder, why not heat the solder inside and push the capacitor into the hole while the solder was more malleable?
Since I didn’t have a tool to hold the board, I had to use one hand to hold it steady while pressing the capacitor, and the other hand applied the heat. It was difficult, but after a while, I succeeded. And when I tested it, the card was still working! Phew, what good news!
The motherboard was easier to work on, especially after the trouble I had with the video card. The only problem was that the capacitors I needed to replace were 3300µF at 6.3V, but the store sold me 3300µF at 16V capacitors. That alone wasn’t a problem, but the real challenge was that they were much bigger than the originals. The three capacitors near the processor, for example, didn’t seem to fit properly because of their size.
Even so, with a bit of patience and improvisation, I managed to secure them all safely. The final result was satisfactory (sorry for the horrible image, my bad):
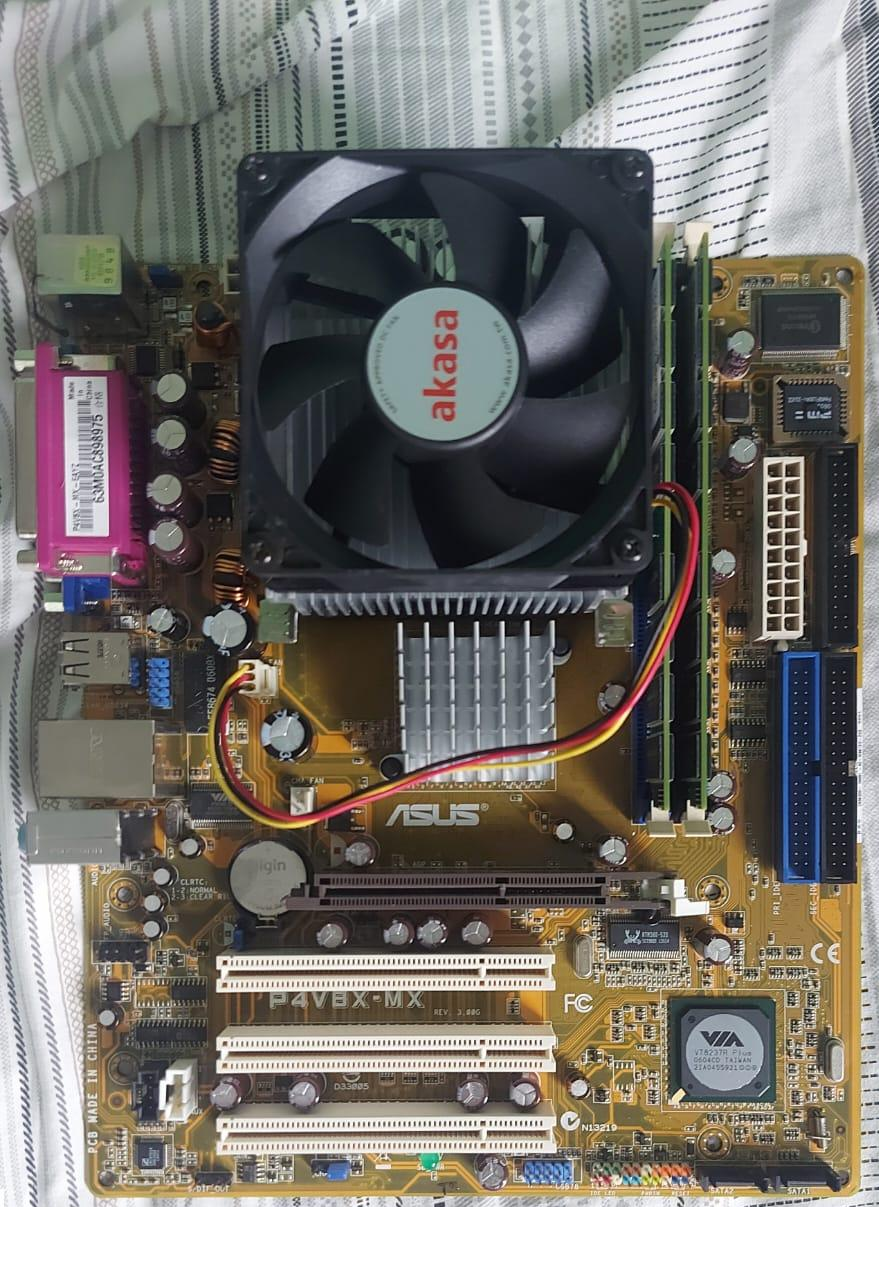
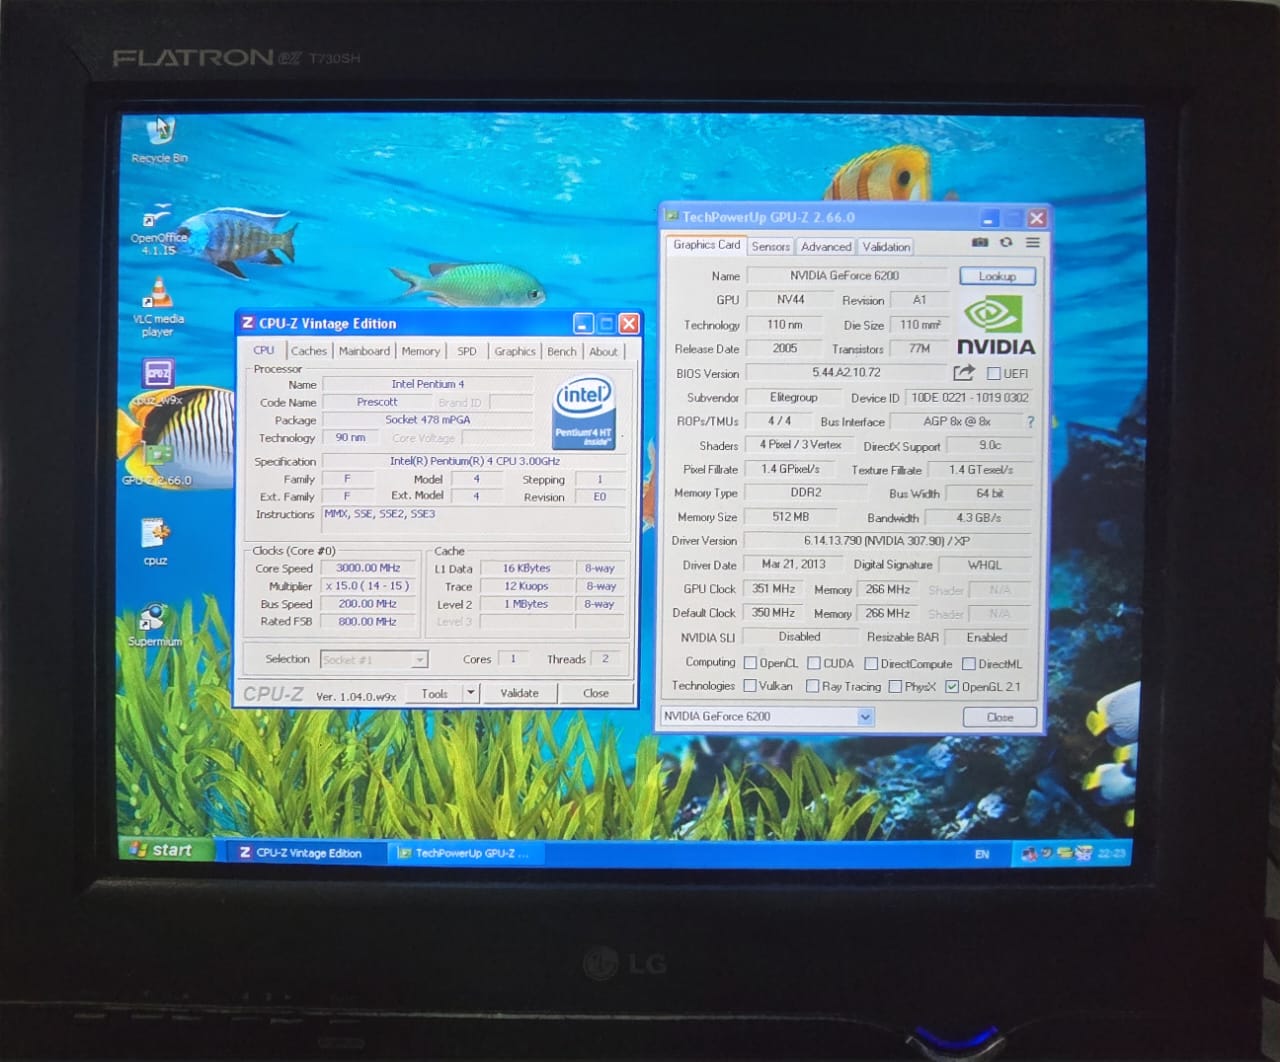
After all that, the suspense of whether the motherboard would still work was over when the boot screen appeared. And after so much work, I managed to install the operating system.
And with that, my computer was finally assembled! And what did we learn from all this? Old capacitors are evil. That’s where I stopped. After installing XP, I’m still deciding exactly what to do next. I played around a bit with it and am really enjoying going back to using a system like this. I want to write a blog talking about the benchmarks this PC can run, but I still don’t know which games to choose for the tests. I also want to run the legacy update and do some customizations, but that’s for another time. It was a complicated journey, but fun. Thanks for reading this long blog post! If you’re into this or have any ideas about what I can do with my retro PC, let me know!
That’s it for today. Goodbye.